Export |
Once created, users can export user-defined, complex cables to a library to be used in other projects or shared with other users.
To export a single overbraid, shield, or conductor:
Follow the steps in the relevant previous section to create a new overbraid, shield, or conductor. In the Properties Panel, ensure that the name field is unique from other cables in the library. Users may wish to define more fields for ease of use (e.g., changing the company name will create a new top-level list in the Library tab, changing the category name will create a second-level list, etc. - see image in 1f). Note that when exporting with this method, the main cable category (i.e., overbraid, shield, or conductor) will not change.

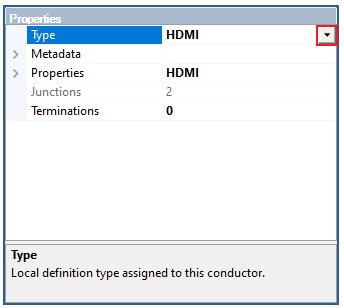
Return to the Cable Properties window by clicking the down arrow next to the cable name or by clicking
 Overbraid,
  Shield, or
  Conductor from Cabling
  within the Harness section under the MHARNESS tab in the ribbon.
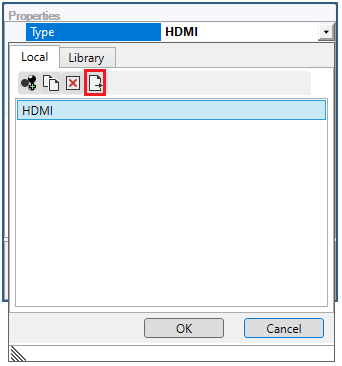
Within the Local tab, select the cable to export, then click the export
 button.
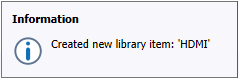
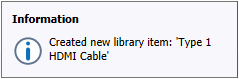
A pop-up will appear at the bottom of the model window indicating that the cable has been exported.
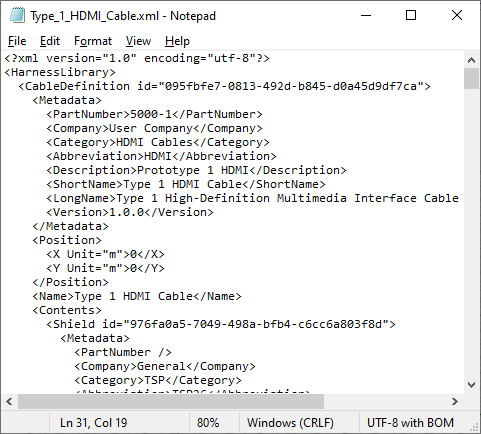
The new library item is written out as an .xml file into the C:\Users\username\AppData\Roaming\EMA\Library folder. Using the roaming folder allows the user to access their library from any network computer.
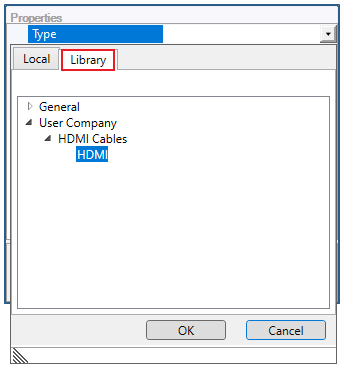
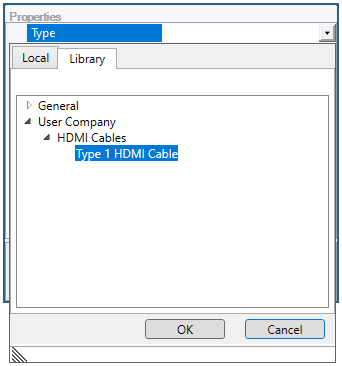
The new library item will appear within the Library tab of the
Overbraid, Shield, or Conductor type the next time EMA3D is opened.
To share a library item, copy the .xml file and send it to the new user. The new user should then drop the file into their C:\Users\username\AppData\Roaming\EMA\Library folder. Upon opening or restarting EMA3D, the new library item will appear within the Library tab of the
Overbraid, Shield, or Conductor type.
To delete a library item, navigate to the C:\Users\username\AppData\Roaming\EMA\Library folder and delete the .xml file for the cable. Upon opening or restarting EMA3D, the library item will not appear within the Library tab.
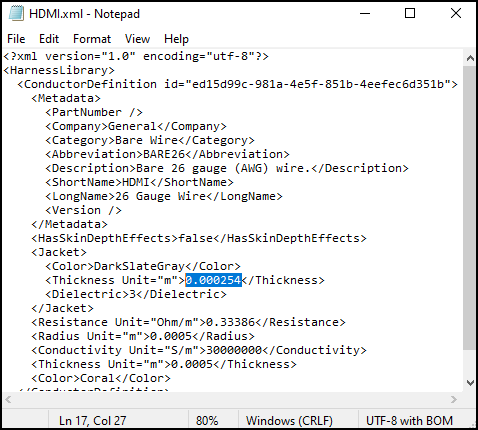
To permanently change a previously-exported cable, navigate to the C:\Users\username\AppData\Roaming\EMA\Library folder and open the .xml file for the cable using a text editor. Change the desired cable properties, save the file, then close it. Upon opening or restarting EMA3D, the library item will have the updated cable properties.
To export a multi-wire cable:
Follow the steps in the relevant previous sections to create a new, multi-wire cable in a line segment in the model.
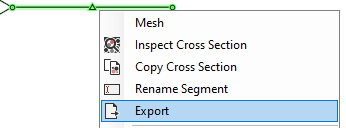
Select the line segment containing the cable to be exported. Use the Inspect Cross Section Tool, if needed, to find the proper segment. Note that all wires in the selected line segment will be exported as a single cable; therefore, if only one sub-cable in a line segment is desired, it will need to be isolated in its own line segment first.
Right click the selected line segment and select
Export from the pop-up menu.
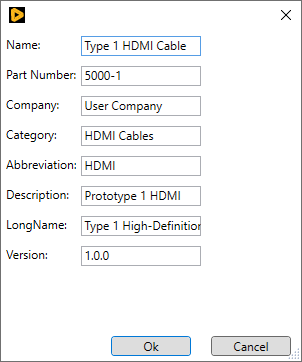
A new window will immediately pop up. Users can now define fields for ease of use (e.g., changing the company name will create a new top-level list in the Library tab, changing the category name will create a second-level list, etc. - see image in 2g). Note that when exporting with this method, the cable will always export to the
 Cable Library.
A pop-up will appear at the bottom of the model window indicating that the cable has been exported.
The new library item is written out as an .xml file into the C:\Users\username\AppData\Roaming\EMA\Library folder. Using the roaming folder allows the user to access their library from any network computer.
The new library item will appear within the Library tab of the
Cable type the next time EMA3D is opened.
To share a library item, copy the .xml file and send it to the new user. The new user should then drop the file into their C:\Users\username\AppData\Roaming\EMA\Library folder. Upon opening or restarting EMA3D, the new library item will appear within the Library tab of the
Cable type.
To delete a library item, navigate to the C:\Users\username\AppData\Roaming\EMA\Library folder and delete the .xml file for the cable. Upon opening or restarting EMA3D, the library item will not appear within the Library tab.
To permanently change a previously-exported cable, navigate to the C:\Users\username\AppData\Roaming\EMA\Library folder and open the .xml file for the cable using a text editor. Change the desired cable properties, save the file, then close it. Note that in a multi-wire cable there will be cable properties for all wires in the cable, so users should be careful to edit the correct one. Upon opening or restarting EMA3D, the library item will have the updated cable properties. Upon opening or restarting EMA3D, the library item will have the updated cable properties.
EMA3D - © 2026 EMA, Inc. Unauthorized use, distribution, or duplication is prohibited.