Spectrum File |
As mentioned before, the user will need to set the materials and then mesh the model before being able to create a spectrum file for the particle sources on an internal charging simulation. Below are the links to the Definitions-Materials page along with the meshing section. Once you have completed that portion of the simulation setup, you can return to this page to create the spectrum file.
Now that you've set the materials for the model and meshed, creation of the spectrum file can continue. Similar to the Plasma environment setup, multiple particle source files can be created to achieve multi-particle interactions.
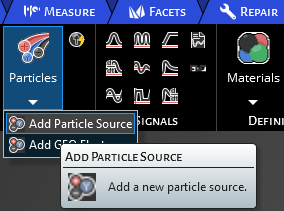
In the Excitation section, click on the Particles
 button and then Add Particle Source to add a particle source to the Simulation tree under Sources. The source properties menu will come up with its available options.
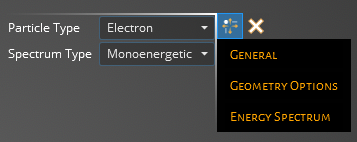
Under spectrum type change it to Monoenergetic. Note if you change the Spectrum Type to File and look under Energy Spectrum you can see that spectrum files can be imported. The user will need to generate a default spectrum file, modify it and load it into the GUI to add it into the simulation.
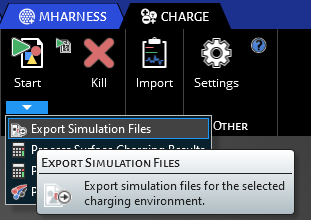
Make sure that your model is saved and note the saved directory. Now in the Analysis section of CHARGE, click the down arrow of Start and select Export Simulation Files. This will export all the files that CHARGE uses to a numbered directory folder. When you first export or start a simulation, CHARGE creates a folder in the same directory as the saved model with the same name. Within this folder will be numbered folders, one for each simulation/export you run.
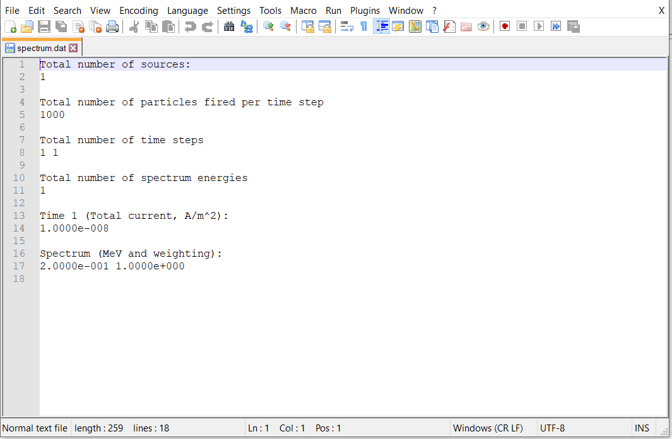
Navigate in your file explorer to the directory and within the first numbered folder find the spectrum.dat file. Right click this and open it in your preferred .txt viewer. The default spectrum file is shown below along with a table describing its properties.
 Spectrum File Entries
Entry
Meaning
Total number of sources
Total number of sources i.e. number of spectrum files added
Total number of particles fired per time step
Number of particles fired per time step used for the particle tracking feature
Total number of time steps
2 numbers used to describe the time steps of the spectrum:
- 1st number-The total number of uniquely defined time steps prescribed in the spectrum file (lines 13-17 in default spectrum above are an example of 1 specifically defined time step)
- 2nd number- The total number of time steps of the spectrum
Total number of spectrum energies
The number of energy bins defined in the unique time step(s)(Default case just has one energy)
Time 1 (Total Current, A/m2)
The current density of the 1st unique time step
Spectrum (MeV and weighting)
2 numbers used to describe the spectrum energy and weighting of the spectrum bin (multiple bins allowed by setting the Total Number of Spectrum Energies to the number of bins you desire):
- 1st number - The energy of the bin in MeV
- 2nd number - The weight of the bin compared to the total number of bins (Effective Bin Weight = (Bin Weight/Total Weight)
The spectrum file can be as simple as a monoenergetic source like the default file, or can have a distribution with many energy bins. The source time stepping is independent of the simulation time steps and so can be turned off before the simulation time by having less steps than what was set by the domain (individual time step length is still defined by the domain), which is an example of simulating shadowing effects. Multiple excitation sources i.e. multiple spectrum files can be used. For an example of setting up a more complicated spectrum file, see the Stepped Shield tutorial link below in the See Also section. Once you have built the spectrum you want for your simulation, save the file (spectrum.dat) in your .txt reader.
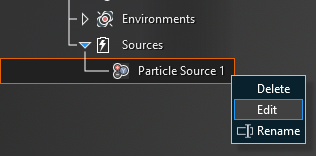
Go back to the Discovery window under the CHARGE tab and navigate to the Simulation Tree. Under Sources, you will see the Particle Source you made earlier. Right click the particle source and select edit to open the properties menu back up.
In the properties menu for Spectrum Type: File, now you can click the import button to open up the browsing window. Navigate to the directory of the first simulation exported file and select the spectrum.dat files that we modified earlier. Double click it to add it to the GUI of CHARGE.
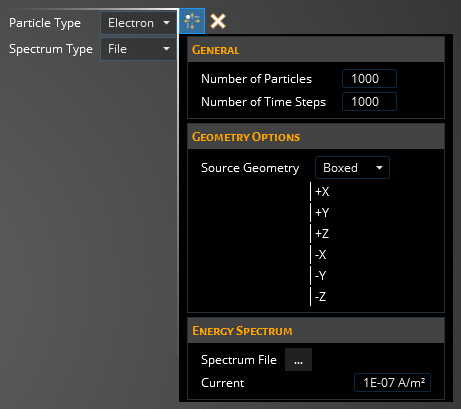
With the file loaded you will still need adjust the Particle Type and Geometry Options. The general settings are defined within the Spectrum Data. Now the Particle Source has been fully defined and you are ready to continue to the rest of the simulation setup, which would be running the simulation in the Analysis section as we've already set the materials of the model and meshed.
Other Resources
EMA3D - © 2026 EMA, Inc. Unauthorized use, distribution, or duplication is prohibited.