Shielding Effectiveness |
The Shielding Effectiveness automatic workflow allows users to run a basic shielding effectiveness simulation using only one click. The workflow automatically assigns structural steel as the material type to the geometry, defines the domain and spatial/temporal steps, illuminates the geometry using an incident planewave with a Gaussian pulse, places a probe within the cavity of the geometry, and then post-processes the results.
Model geometry should be open in the model window prior to beginning the automatic workflow.
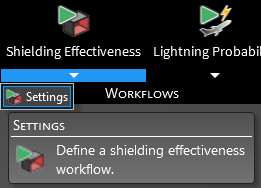
By default, the shielding effectiveness automatic workflow uses a minimum of 50 spatial steps across the domain to mesh the geometry. If different resolution is desired, click the dropdown arrow beneath the
 Shielding Effectiveness button in the Workflows section of the EMA3D tab in the ribbon then click Settings.
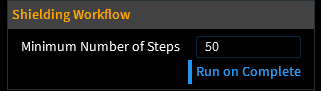
Expand Shielding Workflow in the Properties Panel and then change the Minimum Number of Steps. Click OK
 to save and run.
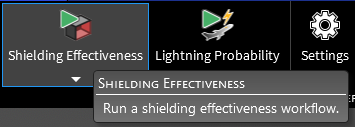
Alternatively, if the default number of 50 is sufficient, simply click the
Shielding Effectiveness button in the Workflows section of the EMA3D tab in the ribbon to start the simulation.
Entry | Meaning |
|---|---|
Minimum Number of Steps | The minimum number of lattice spatial mesh steps within the domain |
Run on Complete | True/False - whether to run the automatic workflow once OK is clicked (blue indicates True) |
EMA3D – © 2026 EMA, Inc. Unauthorized use, distribution, or duplication is prohibited.